
This filled day of the dead bread is a must try. If you have ever tried the classic pan de muerto, which is the day of the dead bread, then you have to give a this filled pan de muerto a try. Filled with what? with a lot of different things, you will see here. Now, filled pan de muerto is not the traditional way to eat pan de muerto, but it is certainly delicious.
Jump to Recipe
Pan de muerto is a very important part of the Day of the Dead every November 2nd in Mexico. This day is very beautiful, and perhaps one of my favorite days, for all that it represents. If you want to learn more details about this tradition and about the classic pan de muerto recipe, go to the our classic pan de muerto, you will love it.

In fact, the only difference between our classic pan de muerto recipe and this filled pan de muerto is only the filling really. So the bread recipe itself is the same in both cases. And as for the filling, what do we use, you ask? Well this is where we get creative and original.

So, as you can see here and in the videos of this recipe in our social media, we used a bunch of different fillings. We used cream cheese, nutella and lotus biscoff cookie butter. And here’s the best part, you can actually use a lot of different things. You could use cajeta, dulce de leche, or even some type of marmalade. So go ahead and get creative and use whatever you like best!

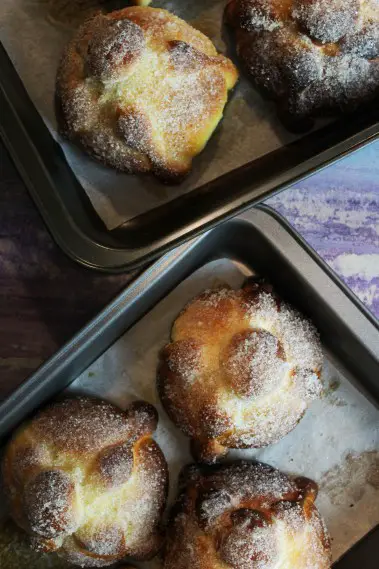
The result is a soft, fluffy pan de muerto that feels like cotton when eating it. Wonderful! and it is delicious. With the filling that gives it all a different and deacadent touch.

If you like this recipe, you have to check out our pineapple tamales, a traditional recipe that you will fall in love with if you like Mexican food. A recipe you can’t miss.


Ingredients
Method
- In a medium bowl place the warm milk with the yeast and mix with a spoon until well blended. Let it sit for 10 minutes for the yeast to activate.
- Freeze balls of about 3 tablespoons of each filling you want to use.
- Separately, on a clean counter place the flour with the sugar and salt and mix. Make a hole in the center to add the eggs, yolks and the yeast mixture. Also add the orange juice and zest, vanilla extract and orange blossom extract.
- Integrate with your hands from the center to the edges to form a dough. Knead by beating and folding on itself for 10 minutes until the dough better forms.
- Stretch the dough a little with your hands and add the butter (which should be soft) in the center. Fold in the edges of the dough so that the butter stays in the center.
- Knead again but this time for 15 minutes. The dough will feel very sticky but it is important not to add more flour and to knead it by beating it against the counter and folding it over itself, using a dough scraper to help the dough come off (the whole kneading process can also be done in a mixer with the dough hook on).
- Coat the dough with a little vegetable oil, place it in a bowl and cover it with plastic wrap and a kitchen towel. Let it rest in a slightly warm place for 2 hours until it doubles in size.
- Once the dough has doubled in size, place it on the counter and cut a quarter of it to form the top of the breads.
- Divide the remaining dough into 6-8 pieces and shape each into a circle. Roll out each ball and place a small ball of frozen filling in the center. Cover the filling with the dough, pinching a little at a time to wrap it all up. Place each filled dumpling on a large baking sheet lined with baking paper.
- From the reserved dough, cut a piece that will be used to make the balls that will go on top of each bread. Cut the rest of the dough into 12 or 16 small pieces to make the bones (each bread needs two strips of bones). Form strips with each piece by moving the three middle fingers of the hand over the strip in such a way that it becomes thicker in the areas between the fingers. Simulating bones.
- Place two strips of bones on each loaf, forming crosses. Then, divide the dough reserved for the balls into 6-8 pieces, shape them round and place them on top of each bread.
- Cover the breads with plastic wrap and let them rest for 1 hour and a half until they double in size. Preheat the oven to 356° F (180º C) 15 minutes before the end of the 2 hours of resting time.
- Once the loaves have doubled in size, bake them at 356° F (180º C) for exactly 20 minutes.
- Once the breads are ready, let them rest for 10 minutes. Then, brush each one with a little melted butter and quickly sprinkle with sugar. Let them cool down completely before eating them.
Tried this recipe?
Let us know how it was!

Leave a Reply